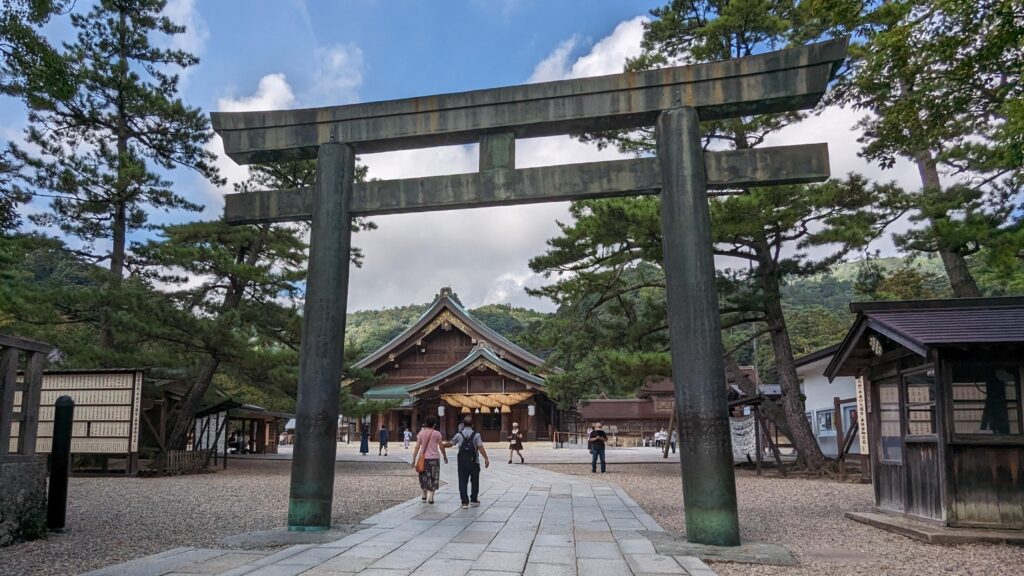
Japan is a faraway, mysterious country. And when travelling to Japan, determining what to take with you on your trip poses a big challenge. What clothes to bring, how to buy the JRPass, how the public transport works, what the customs are and much more. In this post, I will list the most important challenges I have faced – everything from buying the JRPass to simple everyday mistakes that could have been avoided.
JRPass
The first big thing that you might consider is buying the JRPass. Japan Rail Pass is a ticket that can be bought by tourists travelling to Japan. It allows you to take any JR-operated train – including the high-speed bullet trains, as well as JR buses and the Miyajima ferry. There are many different ways of buying it – either through the official website or through 3rd party sellers. The latter option is usually a bit cheaper, but one benefit of buying through the official website is the ability to reserve seats using the website. Otherwise, all the reservations need to be made at a train station. In the end, you still have to pick up the ticket before boarding the train in both cases, so it might not be worth it. And one more important thing. JRPass allows you to take any JR train except for two types of bullet trains: Nozomi and Mizuho. They are a sort of an exception but they aren’t really much different from other bullet trains.
So, JRPass used to be a great way to save some money and time by having a “universal” ticket on all the JR lines. However, as of October last year, the price of JRPass has gone up significantly. It is not really a cost-efficient option anymore. It might still be worth it for you if you intend to travel a lot, but generally speaking, if you just plan to use it to make a couple of bullet train trips, it probably isn’t worth it. You can use one of the many JRPass calculators on the web to figure out if it is worth it for your own journey. Here is one of the websites I have found: Japan Rail Pass Calculator.
Navigating public transport
Navigating the subway of Tokyo, the buses and trams in Hiroshima or anywhere else in Japan might differ from how things are done elsewhere in the world. Usually, it is not as simple as just buying a ticket from point A to point B or buying a ticket that works on any subway line – there is usually no “universal” ticket. There are also multiple subway companies and different tickets for all of them. You can avoid all this hassle by buying a Suica card and never bother about buying any subway, most train and tram tickets.
Regarding the Suica card. While I was in Japan, there was a semiconductor shortage. This meant, that there were no Suica cards available for tourists – except for the Suica Welcome Card – which is valid only for 30 days. At the time of writing this, the Suica cards seem to be available at some train stations for tourists only. So, if you do manage to buy one it is super handy! You don’t have to buy a subway ticket and a lot of train tickets most of the time and you just tap your card on the terminal as you enter and leave the train station or the bus. The train fare gets deduced automatically. In addition to that you can pay at some vending machines and in stores using this same card. It works as a prepaid card that can be topped up at any of the Suica vending machines.
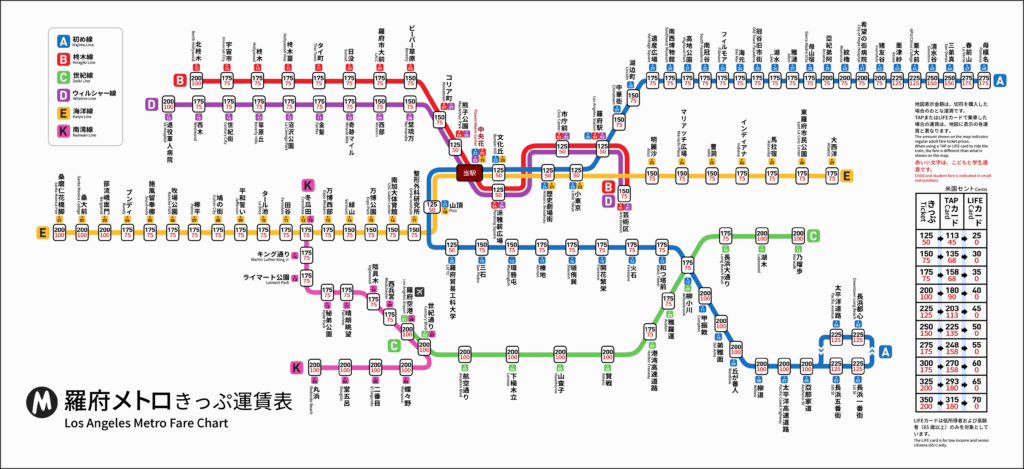
Now, if you do not manage to purchase a Suica card, do not worry! The only difference is that you will have to buy tickets every time you board a bus, a tram or a train. First of all, there is the subway system (and this also applies to a lot of trains). When buying a subway ticket for the first time you are likely to get a little bit confused. First, there is the matter of there being multiple subway lines and sometimes even multiple train companies in the same building. You will have to be careful to buy the correct ticket. And second of all, there is the matter of actually buying the ticket. For the most part, buying a subway (and often a train) ticket consists of the following steps: locating the right vending machine, looking up the price of your ticket on the provided map above the vending machines and buying the ticket. The first part should be manageable if you use Google Maps. As for the second part, the map works the following way. It lists all the lines that depart at the train station that you are currently at. So, you find your destination and your destination lists the price (value) of the ticket that you should pick when buying the ticket at a vending machine. Remember this last part! And if you accidentally purchase the wrong ticket you can always approach the staff and they will refund your ticket.
Secondly, there are the bullet trains. Purchasing tickets for those should not be difficult. You just approach the JR ticket vending machine and follow the instructions to purchase the ticket. Alternatively, you can buy the ticket at the staff booth (or redeem it if you have the JRPass). The Suica card cannot be used on bullet trains.
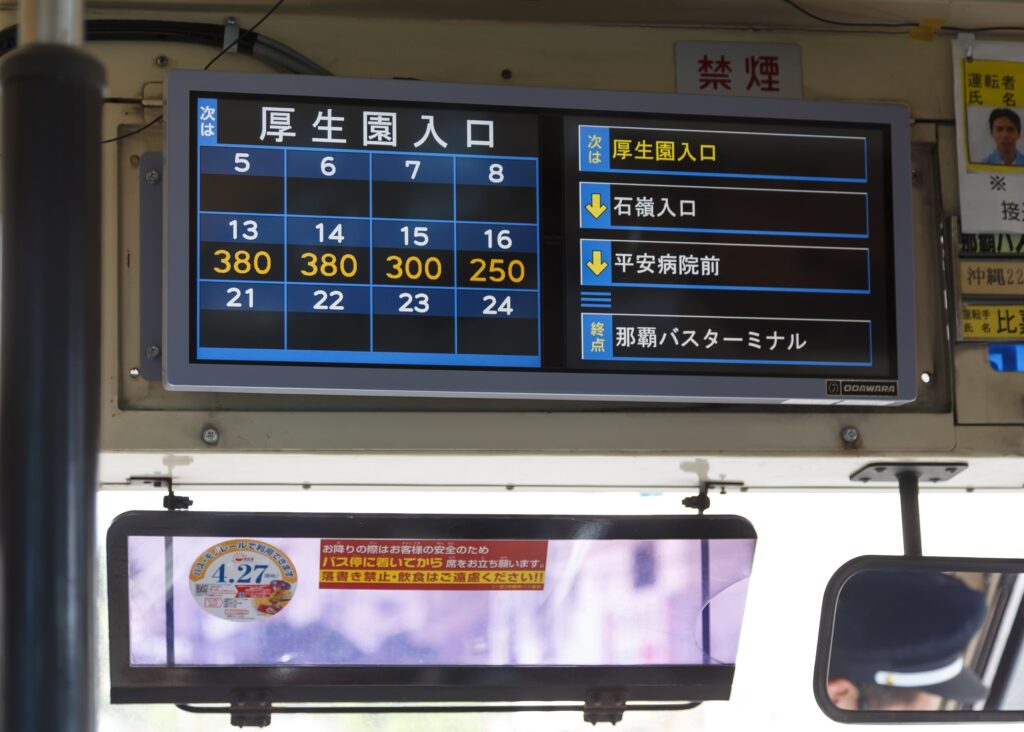
And lastly, there are buses and trams. If you have a Suica card, then you just tap it on the terminal when you enter and leave the bus. Same procedure as with trains. If you do not have the card, then the procedure is quite different and relies on the honour system. Once you enter the bus or the tram it is advised that you take the (free) small paper with a number on it. This numbered piece of paper is usually obtained at the entrance from a little vending machine. The number represents the station where you entered the bus. After that, you wait until arrival at your destination. Shortly before arrival, you have to check the small screen at the top front of the bus. You look for your number and the price that you have to pay will be listed there. The price gets updated with every station since it is based on the distance travelled. Thus it is important to check it right before arrival. You will only be able to pay with cash, so have some spare change prepared to pay for the bus every time! In the worst case, there are usually 100 yen exchange vending machines on most buses. They let you exchange the 1000 yen bill for the smaller coins.
Internet access and Google Maps
Having Google Maps should be a basic requirement if you travel anywhere around the world. Apple Maps or any other Maps might be fine as well, but I am not familiar with them. By using Google Maps I never really got lost. I found all the restaurants and I found it to be extremely useful when navigating the public transport across Japan. It was completely accurate in big cities, especially in Tokyo. It showed exactly when the trains were going to arrive and what route I would have to take to get to my destination. There was really only one downside to it: the inability to remove the Nozomi and Mizuho trains from the route planner since they are not included in the JRPass. Thus, when planning longer bullet-train trips, I often used the Navitime Japan Route Finder to find the routes compatible with my JRPass. Using the combination of both, getting from place to place didn’t feel like a hassle anymore.
However, without an internet connection, none of that could have worked. And when it comes to internet connection, you generally have three options: an eSIM card, a SIM card or Pocket Wi-Fi. I suppose using public Wi-Fi could also suffice in the bigger cities, but I would not recommend it, since having an internet connection on the go is 10 times more convenient.
An eSIM is, at least from my experience, the cheapest option. Especially if you are travelling alone. It is what I bought myself. But you will need an eSIM-compatible mobile phone. If you own a newer model, chances are high that it is. In addition to that, you likely won’t be able to make any phone calls with the eSIM. I bought my eSIM from Airalo. I had mobile data coverage everywhere I travelled, though it is important to mention, that I did not go to any remote areas, so the experience might be different there. I bought a mobile plan with 20GB of mobile data and used a bit more than half of it, even though I often watched YouTube while travelling by public transport. However, when available, I opted to use public Wi-Fi networks to save some mobile data. I also enabled the data saver mode on my phone. So all in all, I think this is a very solid option, is cheap and very convenient to use – no need for changing your SIM or anything, just one click in your app and it works!
The second option is a SIM card. The signal coverage should be about as good as with an eSIM. Though these tend the be more expensive than an eSIM. They also require you to change the SIM card in your phone, which might mean, you won’t be able to use your current one, in case your phone does not support having two SIM cards.
And lastly, there is the option of pocket Wi-Fi. Pocket Wi-Fi on its own is quite more expensive than an eSIM or even a SIM card. However, when used in groups of two or more, it can actually be even cheaper. In addition to that, there usually is no limit to how much mobile data you can use and you can often pay by the number of days that you have been using it. Some Pocket Wi-Fis can also function as a power bank.
So overall, I would say it is mainly a choice between an eSIM and a Pocket Wi-Fi. Do you want more convenience? Then eSIM is a better choice. Are you travelling in a group? Then perhaps a Pocket Wi-Fi might be better. Though remember. If the group splits, only the one carrying the Pocket Wi-Fi will be left with an internet connection!
| SIM | eSIM | Pocket Wi-Fi | |
| Price | High | Low | Medium (very low if in a group) |
| Ease of use | You need to buy it and (potentially) replace it with the one in your phone. | Very easy to use – you just activate it on your phone. But your phone needs to support it! | You will have to borrow it at a train station or an airport and later return it. |
| Amount of data | Limited | Limited | Usually unlimited |
| The best thing about it | Works with any phone | Very convenient, cheap | Might function as a power bank, even cheaper in groups |
| The worst thing about it | Probably the price | Your phone might not support it | If your group splits, you have a problem. Having to deal with returning it |
Clothing and luggage
When it comes to luggage, if you want to have a great, more adventurous trip, I would really suggest minimizing your luggage. In my opinion, it is best to just take one carry-on bag, in which you can pack all your clothes and other necessary things. Preferably one that is comfortable to carry on your back. I did so myself, while still having about a third of my travel bag free. And how did I go about it? I took only about seven days’ worth of clothes and only the essential things that I really needed. And no, I did not wear any of the clothes for multiple days. I just washed them every seven days. And it was totally doable since there were washing machines at every accommodation that I have been to. Hotels, ryokans, homestay, I could wash my clothes everywhere. Usually in the evening, after I came back from sightseeing, I grabbed my bag, and put my clothes in the washing machine. In the meantime, I went to an onsen for an hour or two. I usually dried the clothes one or two more times in the washing machine, since they came out damp after the initial washing cycle. The washing machines usually cost about 800 JPY – base washing and then another 2 drying cycles. And if I didn’t have enough coins for the machine, I just exchanged some at the reception.
With that in mind, I had a single bag at all times, which allowed me to travel effortlessly and I never had to bother about where to leave my luggage. I never had to check in early on to get rid of the luggage. I checked in and checked out whenever I wanted. The only downside was that I could not bring home as many souvenirs as I wanted to. But it’s not a big deal, since I could purchase a bunch of souvenirs at the airport as a part of my hand luggage.
Learning the etiquette and basic phrases
Learning etiquette and some basic phrases when travelling to another country can significantly enhance your experience. While you don’t need to dedicate an entire summer to studying, knowing simple greetings like hello, thank you, and excuse me, along with basic phrases for ordering food and asking for recommendations, can make a big difference. Even mastering just a few phrases may earn you compliments from locals. Etiquette is also important; simple gestures like not speaking loudly on public transportation and bowing when expressing gratitude can be greatly appreciated by Japanese people. Remember, it’s okay to make mistakes—you’re a tourist exploring a new culture. Embrace the learning process, and don’t hesitate to use the “gaijin card” (foreigner card) if needed. To aid you on your journey, here is a helpful website with essential phrases: 23 Basic Japanese Phrases for Your Next Vacation to Japan.
Going to local restaurants
If you want to eat well and try authentic food, then eat locally! Don’t seek only English-named restaurants looking for English menus. Just pick some Japanese restaurants that pique your interest. Want to try some ramen? Look up the name of ramen in Japanese and use that to look up the restaurants. Or even better, just pick any interesting-looking restaurant that you see on the street. And regarding that, if the restaurant is full of locals, then surely the food must also be very good! I followed these rules and I have to say, I never ate bad.
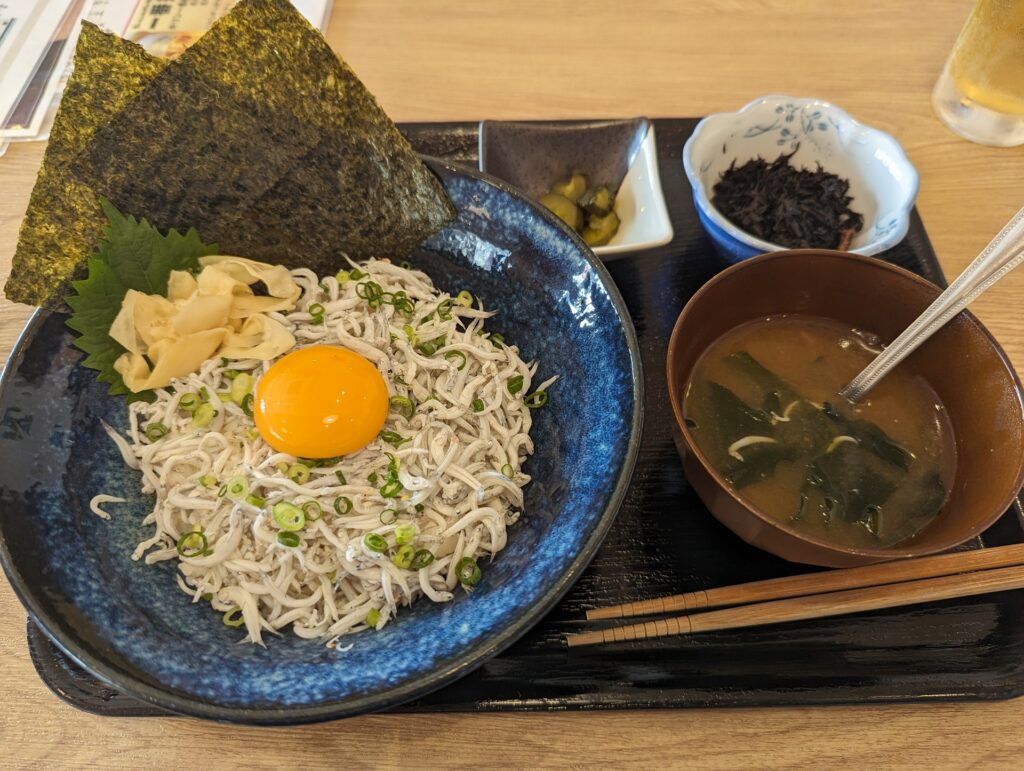
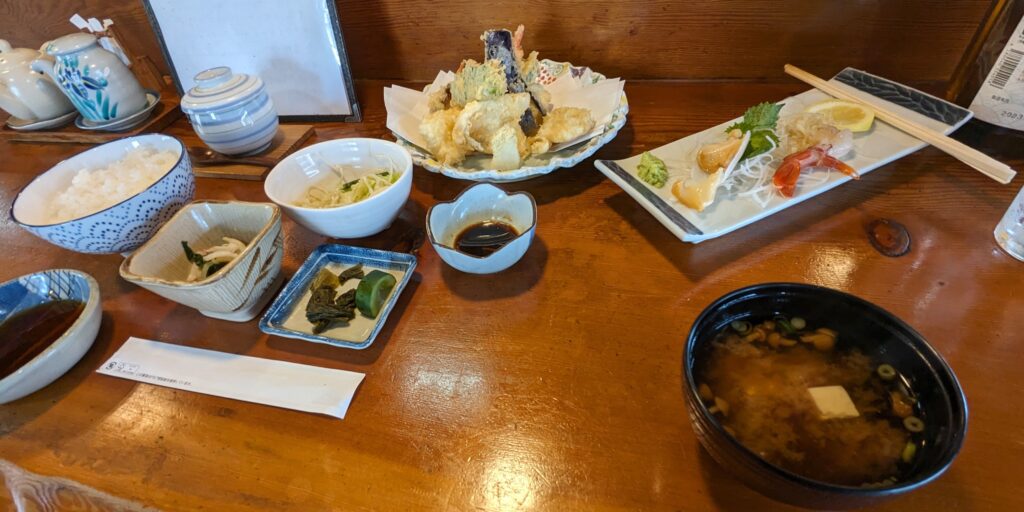
If you are not too picky like me, then I really recommend you ask for recommendations every time you order food. Just use the phrase ‘osusume wa nan desu ka’ (おすすめはなんですか) and they will almost certainly recommend an excellent dish. When I was in Enoshima, I did the same. I am not a fan of seafood, but I went to a well-rated local restaurant and ordered the recommended dish. I really wasn’t sure what to expect. I let myself be surprised. Oh, and it is worth mentioning, that ordering food was a bit different than usual. And this wasn’t the only restaurant with this way of ordering. I will explain it in the next paragraph. When the food arrived and, I am not going to lie, it did not look appetizing. It was a bowl filled with a bunch of small, white fish. And on top of it an egg yolk. It was nicely complemented with a miso soup, some pickles and a special type of algae. I looked them up, and apparently, they are called kombu. They are usually salted and sometimes sesame seeds are added to them when they are used as a complement to rice and similar dishes. As for the miso soup. it also had those small fish inside of it, making it a bit unappetizing. But I set aside the looks, poked the egg and dug in. And it was great! A perfect combination of umami, saltiness and the taste of egg yolk. I was pleasantly surprised and I finished the entire dish.
My point is, to eat local, try out new food and ask for recommendations. With that in mind, ordering food. In a couple of restaurants, I could only order by using their website. You scan the QR code and the menu opens. The QR code is different for every table, so whatever you order, is guaranteed to arrive at your table. On the website, you can order all the dishes, drinks, etc. The menus are also always available in English and most of the time coupled with pictures. I could probably order without that if I didn’t have a phone, but it was a bit confusing for the first time nonetheless. Another different way of ordering that I have seen at some of the restaurants was via a ticket machine. You order and pay for the food at the ticket vending machine, take the ticket and bring it with you to your table or the counter. Your food will be delivered afterwards. Some older restaurants even have those older push-button ticket machines that display a single dish per button.
During the summer…
One thing about Japan, especially Tokyo, is that during the summer it can be very hot. And humid! I travelled there in September and the humidity in Tokyo was plain awful. Once I arrived in Tokyo I felt like I had just entered a sauna. The first week of my trip I was sweating like crazy. I was wiping sweat with a small towel every couple of seconds and looking for some shadow all the time. But there are many ways to combat this. If you are not used to such humid weather I would suggest you follow at least some of these recommendations.
First things first. Though it should be pretty obvious, you need to constantly hydrate yourself! Have a bottle of water with you at all times. And if possible opt for drinks with electrolytes, since you will be losing a lot of them. And you can buy electrolyte drinks at pretty much any vending machine. The most famous among them is Pocari Sweat. While it might not taste the best, it will certainly keep you hydrated!
The next best thing is carrying around a small towel. If you sweat a lot (and you likely will), having a small towel to wipe the sweat off your face will save you from being as wet as a soaked sponge. This combined with being blasted by AC on the subway will quickly give you a cold. I went through this and I have learned my lesson. Another great idea would be to get a cape that gives you a bit of shade and prevents you from catching a cold on the subway. In addition to that, wearing sports clothes might also be a good idea.
Another thing is wearing sunscreen. If you easily get sunburned, it might be a good idea to wear sunscreen. At least during the hottest parts of the day. Or alternatively spend the hottest parts of the day at inside attractions. Taking these precautions should help you stay hydrated and cool!
Conclusion
These tips are just the tip of the iceberg for your journey to Japan. Among them, access to the internet and Google Maps stand out as crucial tools for seamless navigation, discovering local gems, and adapting to various aspects of your trip, including weather conditions. Additionally, when travelling during hot weather, remember to pack appropriate clothing and prioritize hydration. Wishing you safe and memorable travels, fellow adventurers!

